
User Administration Grid
After selecting ‘User Administration’ from the ‘Admin’ menu, you will see a grid of your users setup to access AppCan Mobile and AppCan Cloud.
By default, after accessing User Administration the 1st time, only the System Administrator’s details will be shown.

Adding a User
To add a user to the system, select the ‘Add User’ button.
This will show the ‘User Details’ panel, as below:
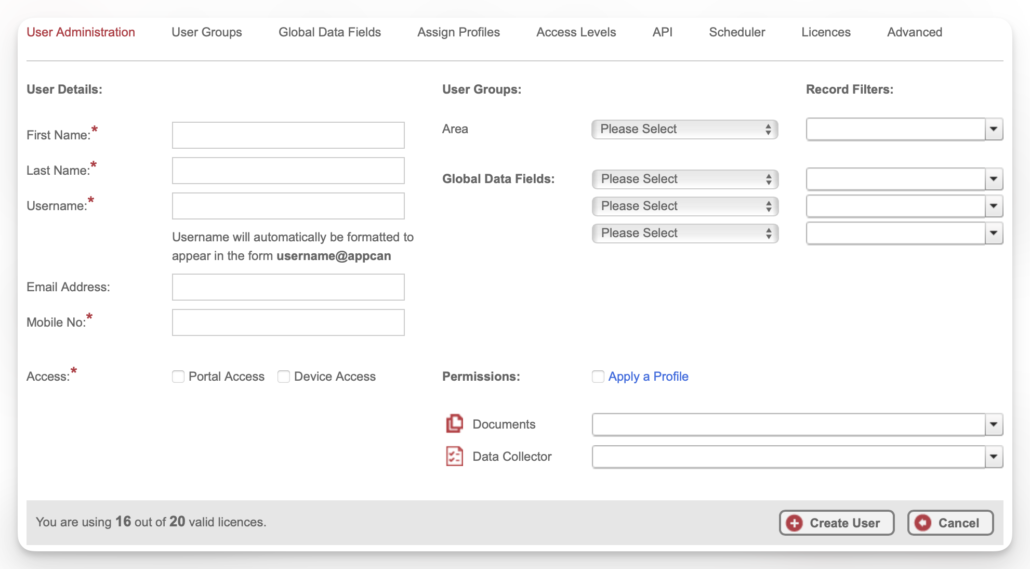
You will be prompted to add the following user information:
| FIELD | DESCRIPTION |
|---|---|
| First Name | Enter the user’s First Name |
| Last Name | Enter the user’s Last Name |
| Username | Enter a ‘Username’. The username will automatically be formatted to appear in the form username@client. For instance, if the username is ‘georges’ and the client is ‘appcan’, enter ‘georges’ and the system will create the username: georges@appcanPlease note: If the username is already in use, a warning message will be shown advising ‘The username is already in use. Please Amend’ |
| Email Address | Enter the user’s Email AddressNote: It is not a mandatory requirement to add an email address for the user, however, please refer to the notes below this table. |
| Mobile No. | Enter the user’s Mobile phone telephone number |
| Access | |
| Portal Access | Select the ‘Portal Access’ checkbox and then select the required Pre-defined or Custom ‘Access Level’ from the dropdown. |
| Device Access | Select the ‘Device Access’ checkbox and then select the required ‘Licence Code’ from the dropdown |
| Groups | Select the required groups for user (if defined in ‘Groups & Quick Filters’ |
| Permissions | To assign / unassign apps for the user, select the dropdown against the required app type, Documents or Data Collector. This will show a list of apps available to assign / unassign. Selecting the checkbox against the required app will assign the app to the user, unchecking the box will unassign the app from the user. To assign all apps to the user, select the ‘Check All’ box at the top of the list. |
| Documents | Select the required Document Distribution apps from the ‘Documents’ dropdown |
| Data Collector | Select the required Data Collector apps from the ‘Data Collector’ dropdown |
After entering the above information, select ‘Create User’
IMPORTANT NOTE:
If an ‘Email Address’ is entered for the user, an email is automatically sent to the user requesting them to set a password for the account.
If an ‘Email Address’ is not entered for the user, the system automatically generates a password for the user. This is shown at the top of the screen after the ‘Create User’ button is selected:

You will need to inform the user of their password.
Reset Password
To delete a user to the system, select the ‘Delete’ icon next to the required user. You will be prompted to confirm deletion of the user.
Deleting a User
Where a user does not have an Email Address set in his profile, you can reset the password by selecting the ‘Reset Password’ button shown below the ‘Licence Code’. A new password is generated and shown at the top of the page.

Recover a deleted User
You can recover a deleted user by selecting the tick box next to ‘Include Deleted Users’ located at the top of the users grid.

Deleted users will then appear in the user grid, greyed out.
Select the ‘Edit’ icon against the required deleted user. This will open the users administration profile. Select the ‘Recover User’ button.
One the users profile has been recovered, you can make any necessary portal and device access changes by editing the users profile.
Exporting user list
You can Export a list of users by selecting the ‘Export’ button at the bottom of the User Administration grid.