
Multi-Factor Authentication (MFA) & Single Sign On (SSO)
For additional security, we can enable Multi-Factor Authentication (MFA) and/or Single Sign On (SSO) for your users. You will need to request these options to be enabled via AppCan Support.
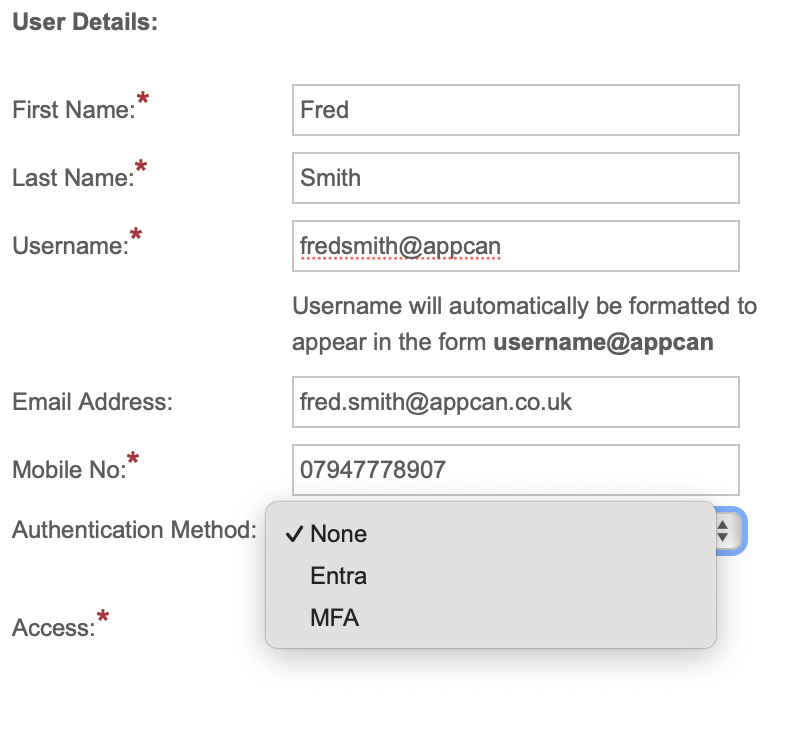
If you have both MFA & SSO enabled, select the required authentication (None, Entra or MFA) from the ‘Authentication Method’ option.
Please note: Users will need to be on AppCan Mobile build 2.20.16 (554) or greater for MFA / SSO to be available.
Multi-Factor Authentication
To enable MFA for a user, select the required authentication method:
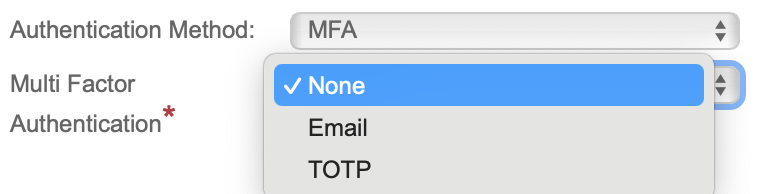
Email:
On login to the cloud or mobile applications, AppCan will generate a random 6-digit code and assign it to the user along with an expiry date. It will then send an email containing this code to the user’s email address. When logging on to AppCan Cloud or AppCan Mobile, it will prompt the user to enter this code after entering their username/password. If the code expires before they’ve entered it, they will be able to request a new code.
TOTP (Time-based One-Time Password):
AppCan will generate a secret key for a user, then generate a QR code based on the key. The end user can scan this into their Google or Microsoft Authenticator app on their mobile device. This will then allow the authenticator app to create a TOTP code which the user will have to enter after logging in via the cloud portal or mobile app.
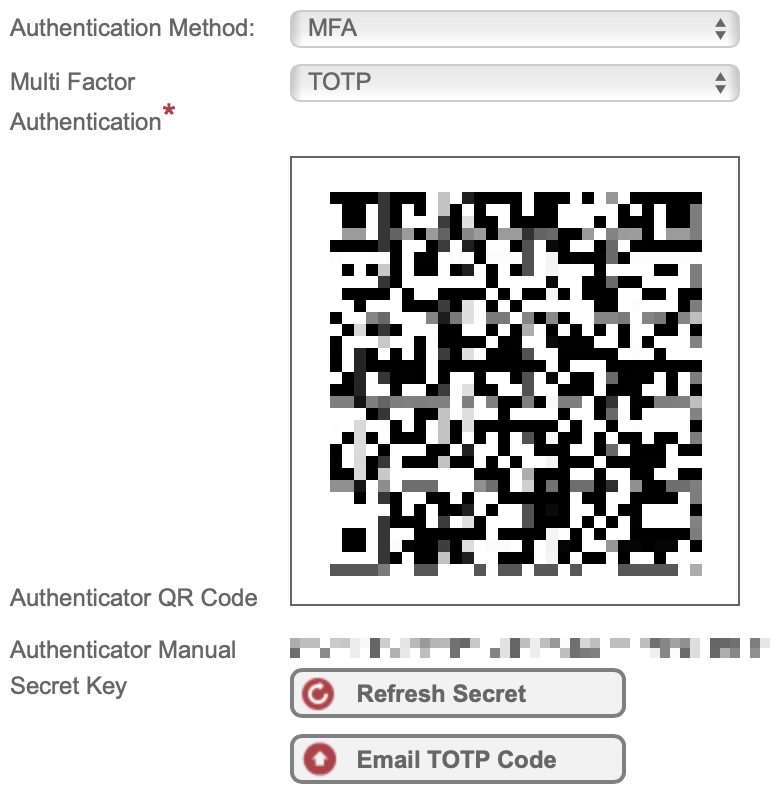
You can email the QR Code and Secret Key to the user by selecting the ‘Email TOTP Code’ option.
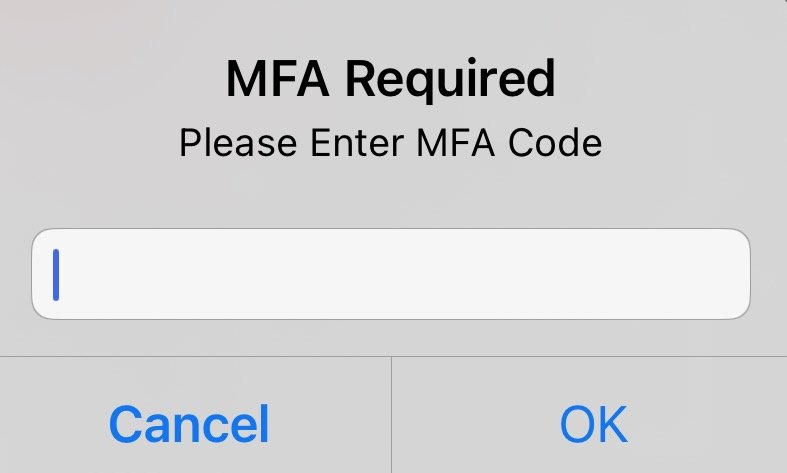
AppCan Mobile:
After logging in, you will be prompted to enter the code sent to your email address.
AppCan Cloud:
After logging in, you will be prompted to enter the code sent to your email address.
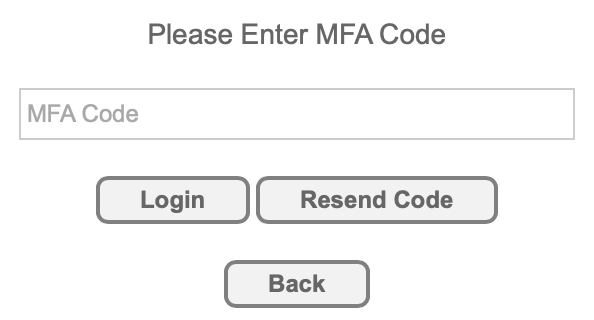
You can select ‘Resend Code’ if required.
Single Sign On
SSO Admin Configuration
Your IT team will need to configure your Azure Active Directory (AAD) for SSO and provide AppCan with the following details:
- Application (Client) ID
- Directory (Tenant) ID
In AppCan, select ‘Admin’ and then select ‘Advanced’. Add your Client Secret and save the changes.

SSO User Configuration
To enable SSO for the required user, in User Administration, check the ‘Microsoft Entra User’ option and enter the Entra Username.

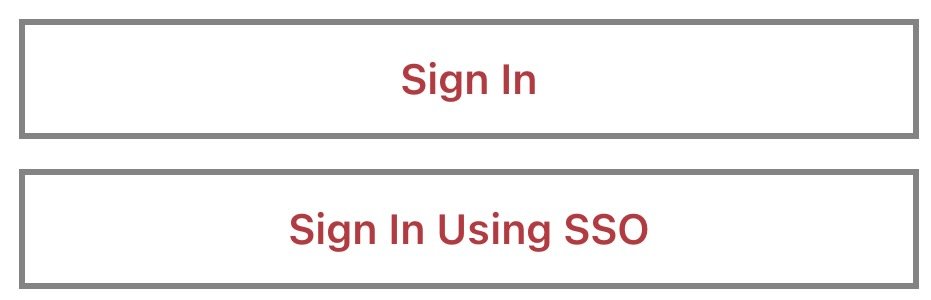
When the user accesses the AppCan Mobile or AppCan Portal logon screen, select ‘Sign In Using SSO’
The user will be shown a modal to enter the required client domain.
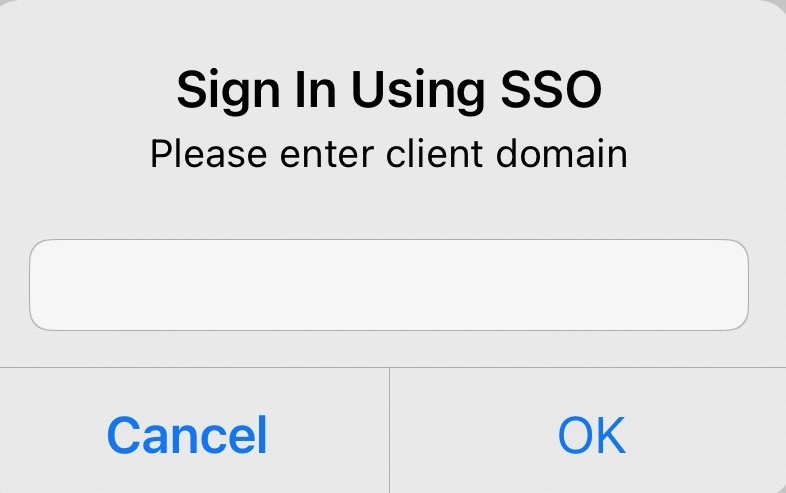
This will then prompt the user to authenticate with their Microsoft account.
Microsoft Azure SSO Configuration
To enable SSO in Microsoft Azure, please follow these steps:
- Go to Azure portal -> Microsoft Entra
- Select App registrations -> New registration
- Enter a name e.g. AppCan
- Supported account types – select ‘Accounts in this organizational directory only’
- Redirect URI – select Web and enter ‘https://<clientid>.appcancloud.com/SsoLogin.aspx‘ – <clientid> = your portal name before the first dot.
- Select ‘Register’
- In App registrations -> All applications select the app registration that was just created
- Make a note of the ‘Application (client) ID’ and ‘Directory (tenant) ID’ as these need to be entered into the AppCan Admin portal
- In the app registration select the ‘Certificates & secrets’ tab
- Select New Client Secret, enter a description, and set the ‘Expires’ value
- Make a note of the secret value as this needs to be entered into the Advanced Admin page of the AppCan cloud portal. Note: the value can only be viewed immediately after creation.
- In the app registration select the ‘Authentication’ tab
- Select ‘Add a platform’ and then ‘Mobile and Desktop Applications’
- Tick the checkbox that begins with ‘msal’
- Press ‘configure’ to save
Here are the most common reasons why you sometimes see the MFA prompt and sometimes don’t:
🔑 1. Conditional Access & Risk-Based Policies
- If your sign-in looks “low risk” (e.g., usual location, trusted device, compliant with Intune policies), Entra ID may let you in without prompting MFA.
- If it looks “risky” (new IP, untrusted device, anonymous network, unusual time), you’ll be prompted.
- Microsoft’s risk-based conditional access evaluates sign-in signals (device health, IP reputation, impossible travel, etc.).
🔑 2. Remembered MFA Sessions
- Entra ID can remember MFA for X days (default is often 14 days, but admins can configure this in Conditional Access or per-tenant settings).
- During that remembered session period, you won’t be asked again unless risk conditions change.
🔑 3. Token & Session Lifetime
- If your primary refresh token (PRT) or session cookie is still valid, MFA isn’t required again.
- Signing out fully or clearing cookies can trigger another MFA challenge.
🔑 4. Trusted Networks / Named Locations
- Your IT team may have defined trusted IP ranges (like corporate networks). From those, MFA may be skipped.
- Outside those ranges, MFA is required.
🔑 5. Per-App Policies
- Some apps may have stricter access controls (always require MFA).
- Others may allow single-factor sign-in if low risk.
✅ In short:
You don’t always see the MFA prompt because Entra ID applies adaptive authentication — balancing usability and security. It only challenges you when the sign-in context or risk signals require stronger verification.