One of the key features of AppCan Cloud is the ability to create and distribute (in real-time) ‘Document Distribution’ apps to all, or a subset of all, field users that have already been setup within the system.
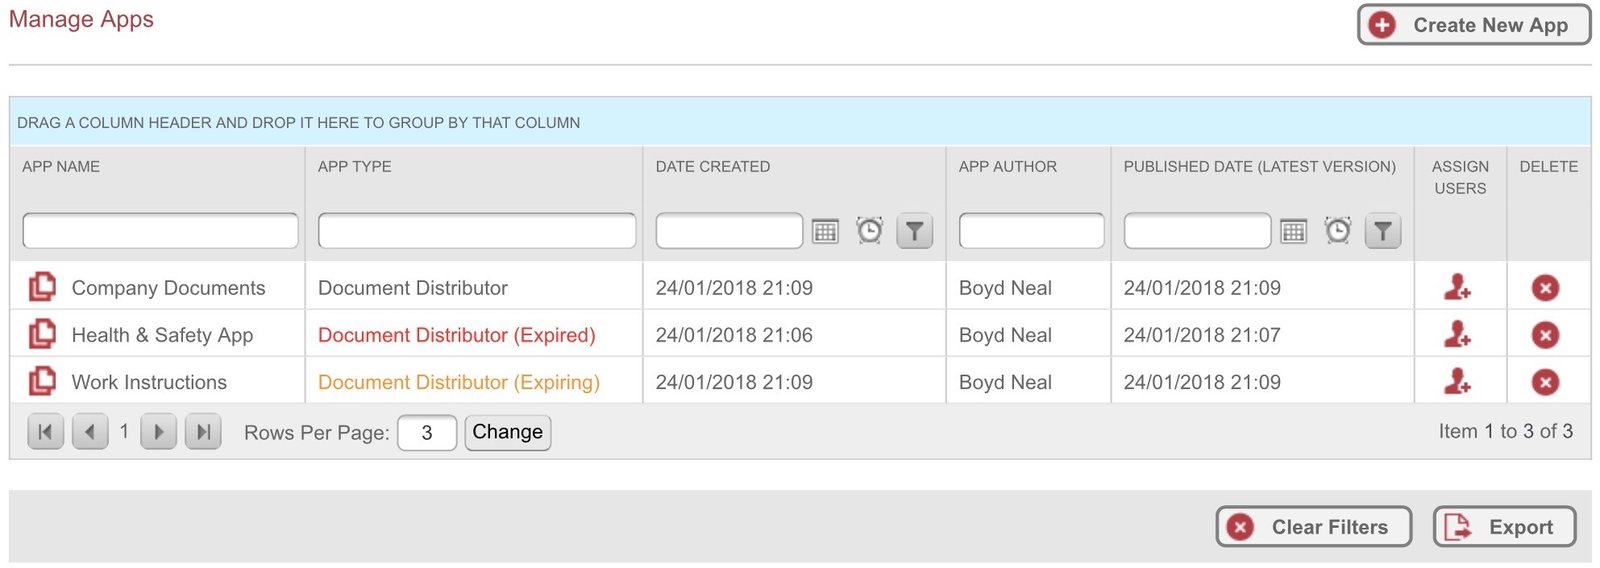
Upon selection of ‘APPS’ from the menu bar, a multi-functional data grid is displayed that allows users to easily review, manage and distribute both ‘Data Collector’ apps’ as well as Document Distribution’ apps to field users.
Creating New Distributor
To create a new Document Distribution App, select ‘Apps’ on the top menu.
Click on the ‘Create New App’ button.

A pop-up will appear.

Click on ‘Document Distribution’
Configuring a Document Distribution App
Upon selecting the ‘Document Distribution’ option from the pop-up window (as shown above), the following screen appears:
Naming an app
Enter the name of the app in the ‘App Name’ field:

Parent & Sub Folders
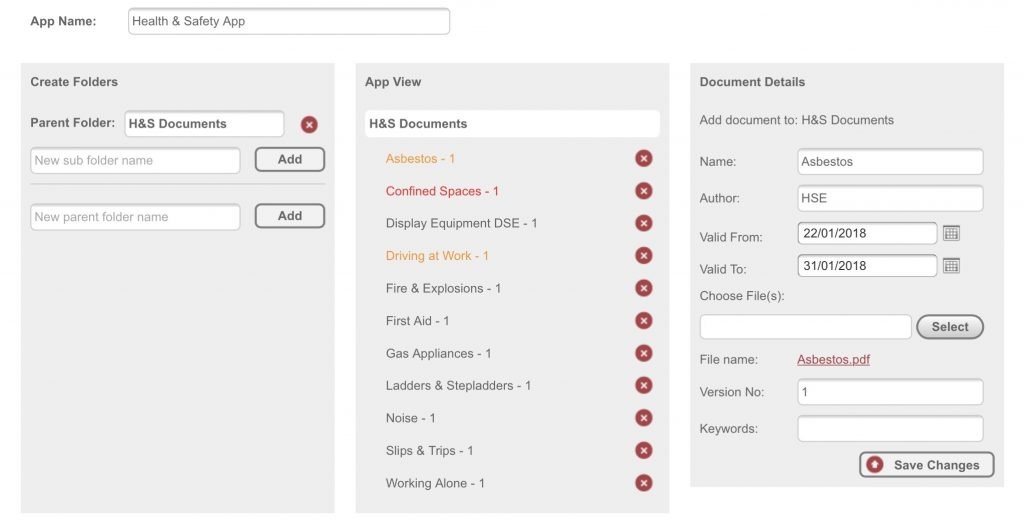
You can structure your Documents in various ways.
Document Distribution folder structures are similar to an actual folder with dividers and documents.
Enter a name for the ‘Parent Folder’ and then select ‘Add’.
This will expose the functionality to add ‘Sub Folders’ to the ‘Parent Folder’.
Uploading documents
After building your Parent and Sub Folder structure, click on the required Parent or Sub Folder from the ‘App View’ panel. This exposes the functionality to upload document(s) to that folder:

Multiple Upload
As well as uploading single documents into Parent and Sub Folders, you can also upload multiple documents in one batch. To upload several documents, select the checkbox against ‘Multiple Uploads’.
Name
Enter the document title in the ‘Name’ field. Due to the screen size of the iPhone in portrait mode, it is suggested you keep Titles (Name) to 30 characters or less, including spaces.
If the ‘Multiple Upload’ checkbox has been selected, this removes the document ‘Name’ field. All documents uploaded by the multi-upload method automatically use the file name of the Pdf as the ‘Name’, and removes the ‘.pdf’ file extension.
Author
Enter the Document’s author name. This is visible to the user on AppCan Mobile, by selecting the information ‘i’ against the document.
Valid From and Valid To
Enter the dates the document is valid from and valid to. This is visible to the user on AppCan Mobile, by selecting the information ‘i’ against the document.
When a user views documents on AppCan Mobile, and the current day is outside the Valid From and Valid To dates, the document will not be available to the user.
Select File
Single Document (Multiple Upload not selected):
On selecting ‘Select’ you will be prompted to select the PDF (Portable Document Format) file from your local machine. This must be in PDF file format.
Multiple Documents (Multiple Upload Selected):
On selecting ‘Select’ you will be prompted to select the PDF (Portable Document Format) files from your local machine. These must be a PDF file format. You can select Multiple Documents from the File Explorer popup:
Apple OSX:
- To select a consecutive files, click the first item, press and hold down the Shift key, and then click the last item.
- To select non-consecutive files, press and hold down the Command key, and then click each item that you want to select
Microsoft Windows:
- To select a consecutive files, click the first item, press and hold down the Shift key, and then click the last item.
- To select non-consecutive files, press and hold down the Ctrl key, and then click each item that you want to select
After you have made your selections, select ‘Choose’ (Apple OSX) or ‘Open’ (Microsoft Windows) on the bottom right of the file explorer window.
AppCan Cloud will ‘cache’ the documents ready for upload. During this process, an icon next to each file will flash ‘orange’ until the document has been successfully cached, after which the icon will go ‘green’ and remain static. After all the documents have been cached, and all icons are ‘green’, the ‘Upload Document(s)’ button will be enabled.
Multiple document selection is capped at a maximum of 30 files per upload. If you have more files, please upload in batches no greater than 30.

To keep PDF documents to the smallest file size, it is suggested that you review all documents and reduce file sizes as much as possible. This may require embedded images etc to be reduced. When a user downloads documents over the mobile network, large files could take significant time to download, and use up data allowances.
Version No
Enter the version number of the document. To update a document to a newer version, after uploading the new document, you must update the version number.
Keywords
Using keywords allows the user to easily search for documents on AppCan Mobile.
It is important to note that the text entered in the ‘Name’ field against each document are automatically used for keyword searches. If you require additional Keywords to be used, enter them in the ‘Keyword’ field.
You can enter as many keywords as required, and should be entered with a space between them. For instance:
Health Safety Risk Assessment
Upload Document(s) button
Once all documents have been cached (static green dot against each file), and all mandatory fields have been completed, select the ‘Upload Document(s)’ button. This will upload each document against the selected folder.
Editing Documents
You can edit a documents in ‘App View’.
Select the document you required to edit. This exposes the ‘Document Details’ view to the right of ‘App View’.
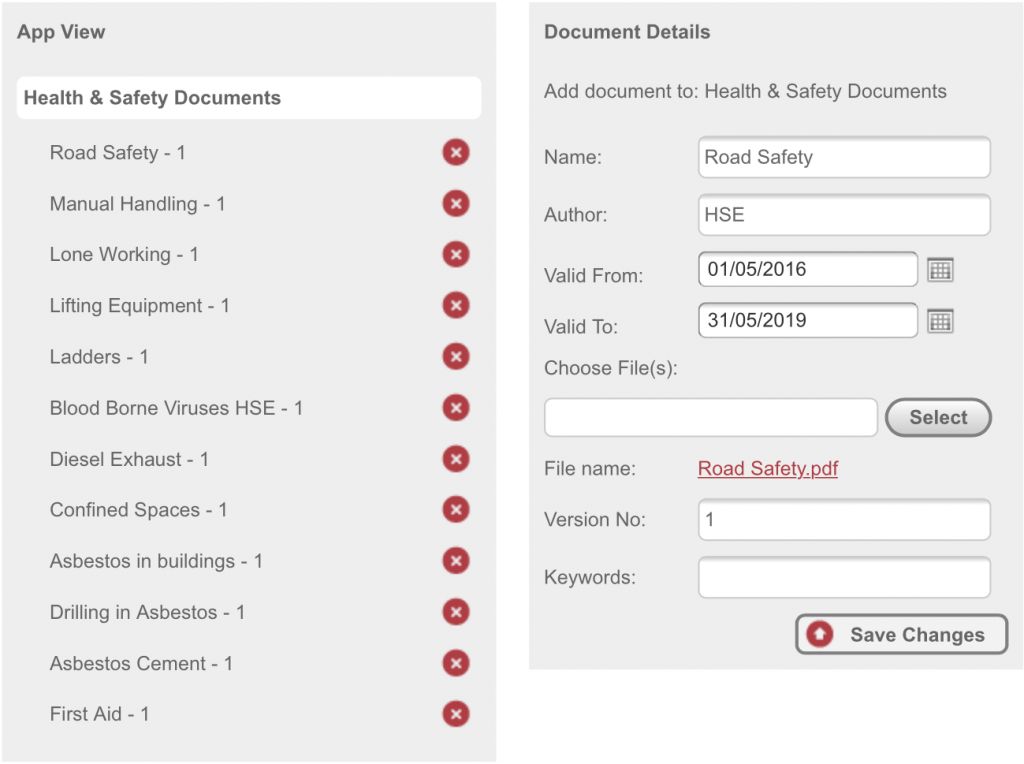
You can make changes to the following fields:
- Name
- Author
- Valid From
- Valid To
- File
- Version No
- Keywords
If you wish to delete a document, select the delete icon next to the required document in ‘App View’.
Viewing Uploaded Documents
You can view documents that have been uploaded in your Document Distribution app, by clicking on the red, underlined filename.
This will open the document in a separate window in the browser, from which you can view, print or download the document.
In the example below, clicking on ‘Road Safety.pdf’ will open the document.

Auto-Read first time install

When documents are published to the user, they are required to ‘Confirm Read’ against each document. This sends a read-receipt to AppCan Cloud (you can view these by selecting ‘Documents’ in ‘View Data’).
When issuing a bulk set of documents, you can select the ‘Auto-Read first time install’ option. This automatically marks each document in the first time download as read. Subsequent documents (e.g. updated document versions) are not automatically read, the user will have to ‘Confirm Read’ against each subsequent document.
Saving and Publishing your app
It is recommended that you frequently ‘Save’ or ‘Publish’ your app whilst building your Document, to avoid data loss, if leaving your computer. AppCan Cloud has an automatic timeout, for security purposes.
During the course of creating a new Document Distribution app, the option to save the current state of the app (without publishing it) is available.
This enables a user to create a new app/edit an existing app over a period of time as well as send an app through any internal approval process that may be in place within a given organisation, prior to publishing it to field users.
To save an app without publishing it or to save any revisions to an existing app without publishing the revisions, click on the ‘Save App’ button at the bottom of the ‘Edit App’ screen

Once the app has been successfully saved, the user is returned to the ‘Manage Apps’ screen.
If the app in question is new (i.e. it has never been published), a light green banner will appear towards the top of the Manage Apps screen stating “The App was created successfully”

and the entry under the ‘Published Date (Latest Version)’ column header will state “Saved Not Published” …
If the app in question has already been published (prior to any revisions that have just been made), a light green banner will appear towards the top of the Manage Apps screen stating “The App was updated successfully” …

and the entry under the ‘Published Date (Latest Version)’ column header will state “Revision Not Published” …
In addition, for both new apps that have not yet been published as well as existing, published apps that contain revisions, a red banner will appear towards the top of the Edit App screen stating “This App has changes made that will not be visible on mobile devices until it is published”


Publishing an App
Once an app is ready to be published (be it a new app or an existing app with revisions), tap/click on the ‘Publish App’ button at the bottom of the ‘Edit App’ screen.
Once the process of publishing an app has been completed, the user is returned to the ‘Manage Apps’ screen and the ‘Published Date (Latest Version)’ column header is updated to reflect the date/time that the latest version of the app was published.
Cancel Changes to an App
Should a user want to either cancel the process of creating a new app or discard any changes made to an existing app (prior to tapping/clicking the ‘Save App’ button), click on the ‘Cancel’ button at the bottom of the ‘Edit App’ screen.

Save As
You can copy an existing Document Distribution app into a new app, using the ‘Save As’ feature. This clones the document structure of existing app and makes an exact copy, excluding the actual documents.
Cloning of Document Distribution apps is useful for distributing documents that maintain the same folder structure as an existing app, for instance Job Packs etc.
To create a clone of an app:
- Select the app you wish to clone and edit the app.
- Select the ‘Save As’ button

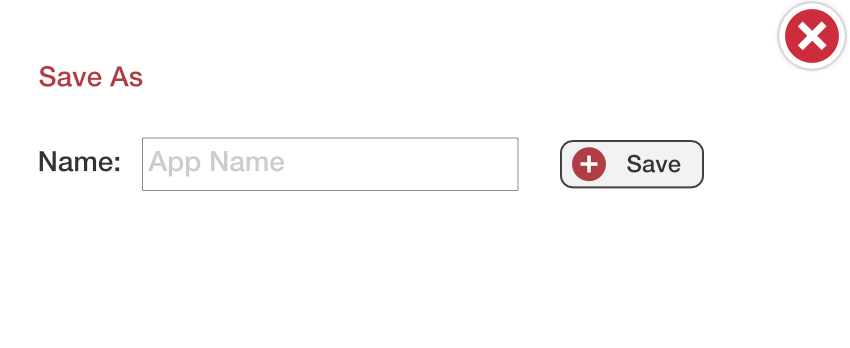
The ‘Save As’ popup box will be shown, where you can enter the name of the new app.
Enter the name of the new app, and select ‘Save’. Your ‘cloned’ app will appear in the app list, where you can make any necessary changes before publishing.
Cloning an existing Document Distribution app only clones the Parent Folder and Sub Folder Structures. It does not clone documents.
Assigning / Unassigning Users
To assign or unassign users from an app, click the icon next to the required app in the ‘Assign Users’ column.
This will popup a grid with the list of users.
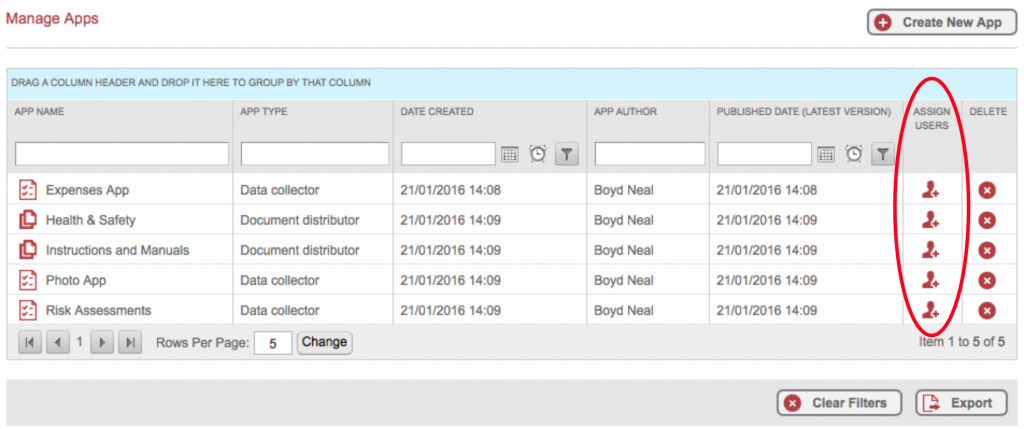
A popup grid will appear, showing a list of available users. In the ‘Assign Users’ column, check to assign users, or uncheck to unassign users for the app. You can also use the ‘Check All’ option to apply the app to all users.
Document Status
The Document Status Indicator allows you to see at a glance if a document’s ‘Valid To’ date is expiring in the next 30 days, or has already expired.
In the ‘Apps’ grid, the ‘App Type’ column shows any documents that have expired or expiring in the next 30 days in a different colour, as below:
- Orange: Document Distributor App contains documents expiring in the next 30 days
- Red: Document Distributor App contains documents that have expired
Within the Document Distributor App, you can see at a glance if a document is expiring within the next 30 days, or has expired.
- Orange: Document expiring in the next 30 days
- Red: Document has expired
