
On Wednesday 15th May, we are releasing our new View Data grid.
The page ‘View Data (New)’ has been re-written and now includes many performance and functionality improvements.
If you identify an issue or bug, you can help us by reporting these to: support@appcan.co.uk (Please provide as much detail as possible, with screenshots, to assist us in replicating the issue).
Our new ‘View Data’ grid brings many new improvements, including:
- New Styling
- Performance improvements
- Sticky Headers & Footers
- Improved ‘Views’ for Personal & Global Views
- Fixed ‘View’ and ‘Checkbox’ columns
- New filter options
- Expand Grid
- Toasters
New View Data Grid Styling
We have introduced the following new styling changes:
- The View Data grid now shows alternating row colours to make it easier to view records
- Buttons at the bottom of the grid are now included in the bottom toolbar
- Updated icons for Photo, Signature, Video and Location fields.
- New ‘Options’ icon shows against each column title (including column and Autosize settings)
- Additional Filters option (funnel icon)

1. Add Record
The ‘Add Record’ functionality remains the same, however, the layout of the popup modal has been restyled.
2. Views
The ‘Views’ functionality remains the same, however, the layout has changed. Please see section below on Views.
3. Column Options
In addition to the functionality to choose required columns, ‘Column Options’ also provides additional functionality to ‘Autosize’ either the selected column, or all columns.
4. View
The ‘View’ functionality remains the same, however, the layout of the popup modal has been restyled.
5. Checkbox
The ‘Checkbox’ functionality remains the same (e.g selecting records to Print / Send / Delete etc).
6. Filters
The ‘Filters’ option have been expanded to include new filter options. Please refer to ‘New ‘Filter’ options’ section below.
7. Rows per Page
‘Rows per Page’ now supports a maximum of 100 rows and on loading of a Data Collector app a maximum of 25 rows are shown to the user.
8. Expand Grid
New ‘Expand Grid’ option now included to expand the grid to full browser window screen. Please see ‘Expand Grid’ section below.
9. Exports
You can export your data based on your ‘Views’ layout. You must ensure you Save / Update any changes made to your View before exporting.
Performance Improvements
We have made many performance improvements to the View Data grid so it quicker to load, paging and the general use of the grid.
Every column that is loaded can affect the performance of the grid and we recommend that you configure the grids to only show the required columns. This is especially important where you have Repeating Sections in your Data Collector app.
By default, after you select the required app, the grid will load.
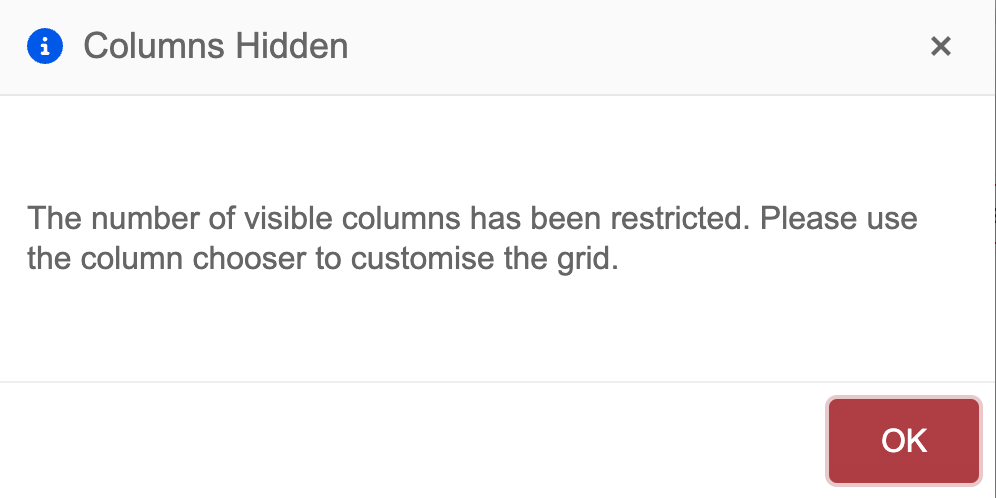
If the Data Collector app contains more than 50 columns, you will see a message box as below:
Selecting the 3 dot icon against and field name exposes a list of options. Selecting ‘Columns’ allows you to choose the required columns to show in the View Data grid.
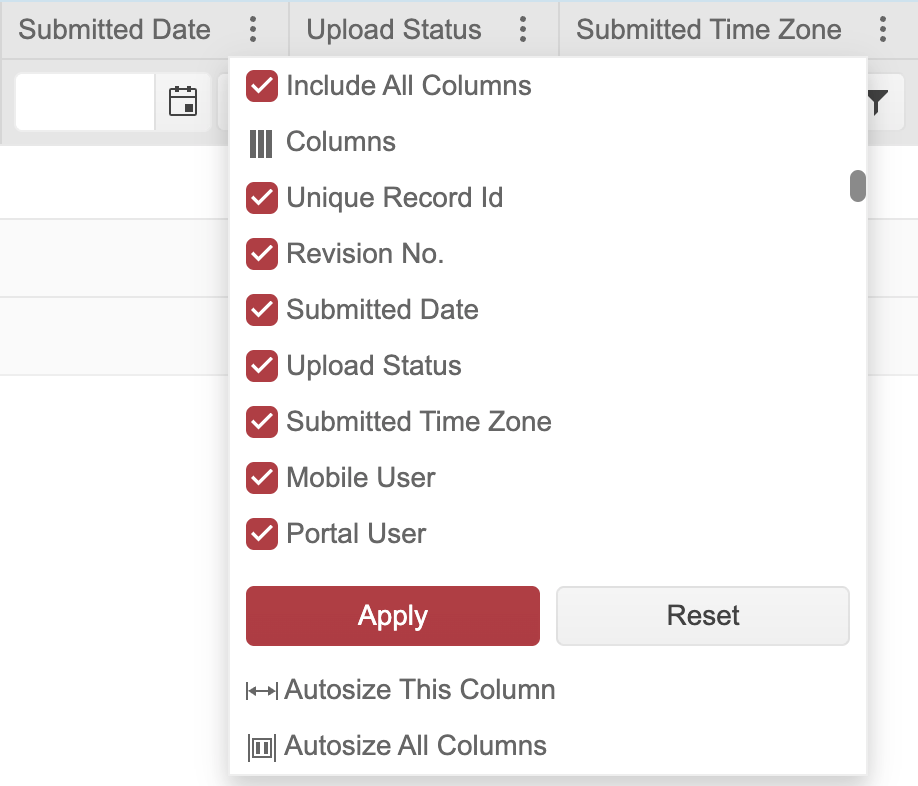
Once you have selected your columns and/or made changes to the View Data grid, use ‘Views’ to save your grid layout. See below on how to use ‘Views’.
Please note: The more columns exposed in the grid will affect the performance of the grid and could cause the grid to load slower, or when paging etc.
Views
‘Views’ allow you to create multiple different views for the same Data Collector app. These views saves the grid with any applied filters, selected columns, column positions, column widths etc.
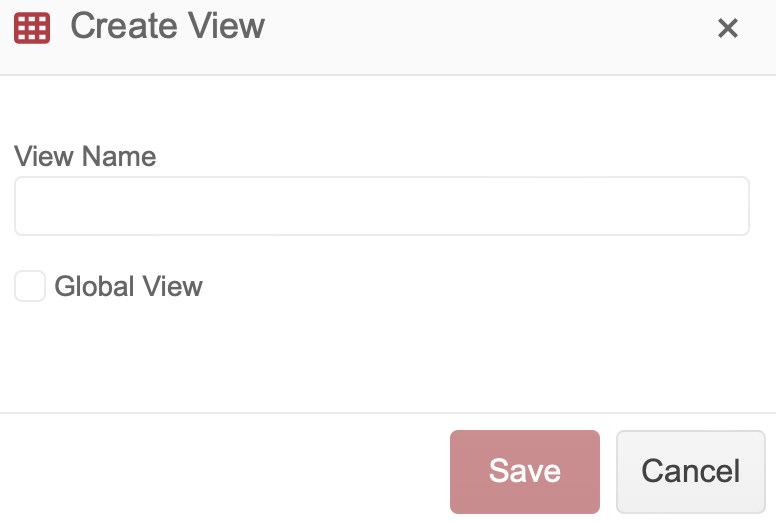
Configuring ‘Views’
- Set your view as required, applying any filters, columns, column positions, column width etc.
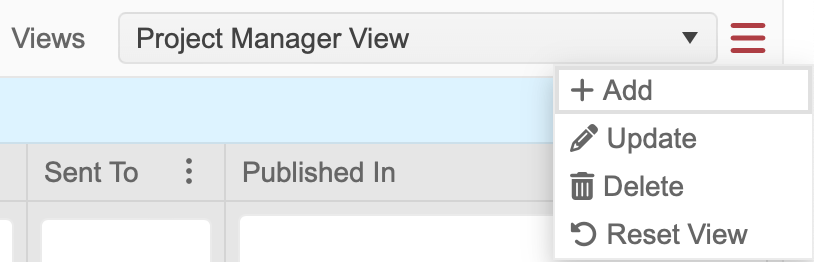
- Once you are happy with your view layout, select the hamburger icon to the right of the ‘ Views’ dropdown.
Selecting the hamburger icon again allows you to ‘Update’, ‘Delete’ or ‘Reset View’
IMPORTANT: Any user-defined views created in the old ‘View Data’ page WILL NEED TO BE RECREATED in ‘View Data (New)’ page. Unfortunately, the modern code used to re-write the page is not backwards compatible with the way the old ‘View Data’ page creates and saves views.
Sticky Headers & Footers
Column headers and footers are now sticky and will remain in place regardless of the amount of rows you have set. You can use the vertical scrollbar to scroll through your records.
The Headers & Footers highlighted in the image below will always remain in place.

New ‘Filter’ options
The available Filter options for Text filters (triggered by the funnel icon) are:
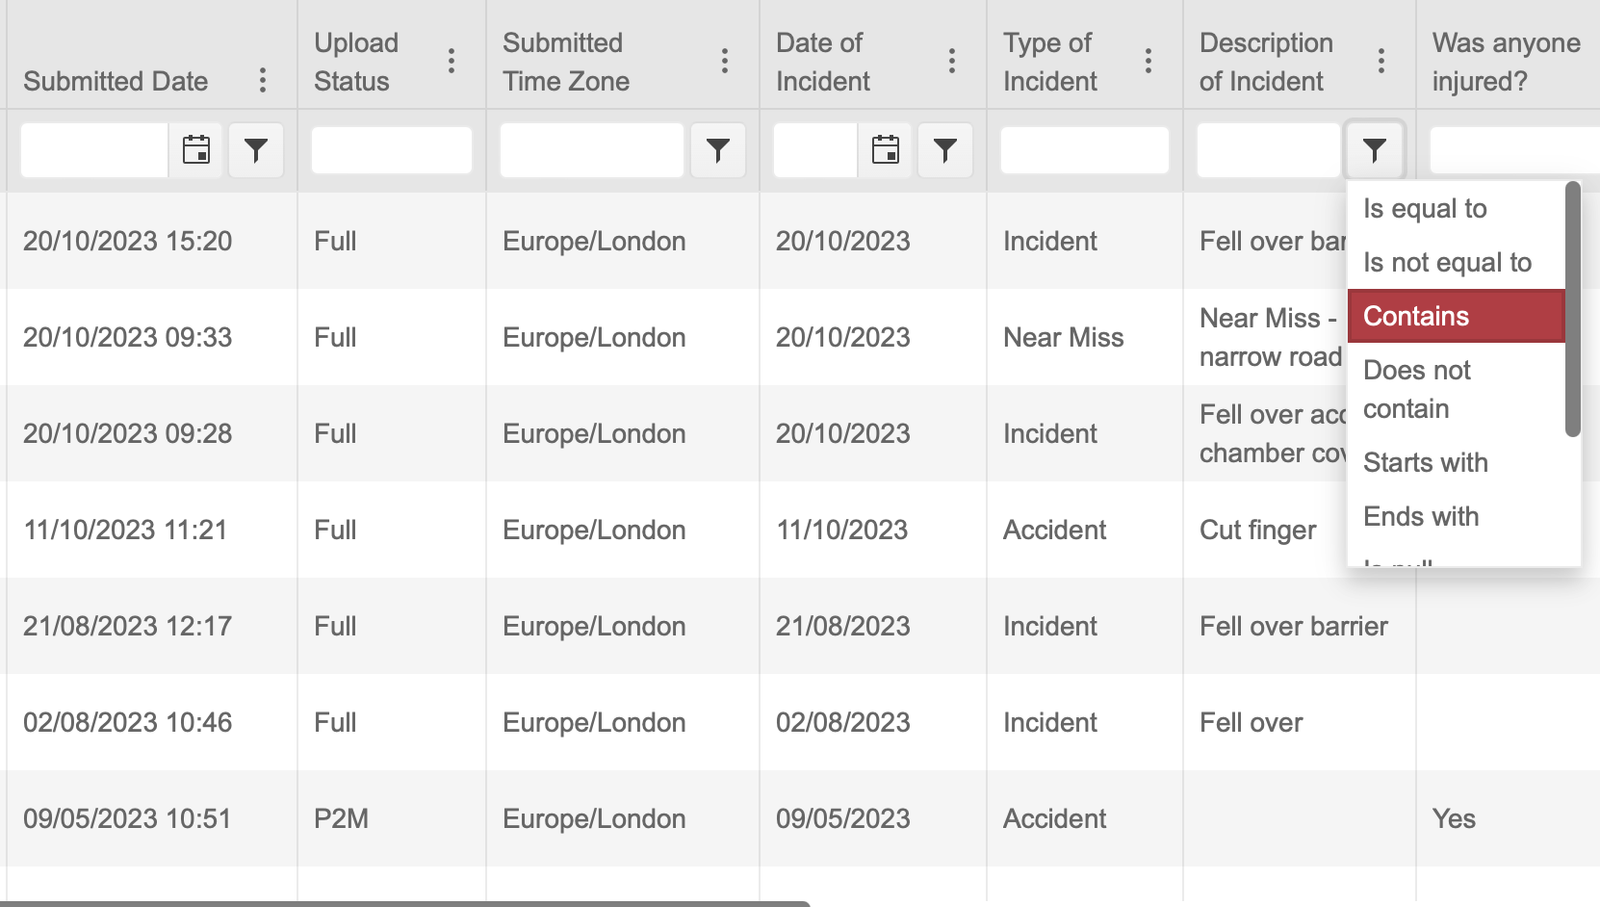
- Is equal to
- Is not equal to
- Contains
- Does not contain
- Starts with
- Ends with
- Is null
- Is not null
- Is empty
- Is not empty
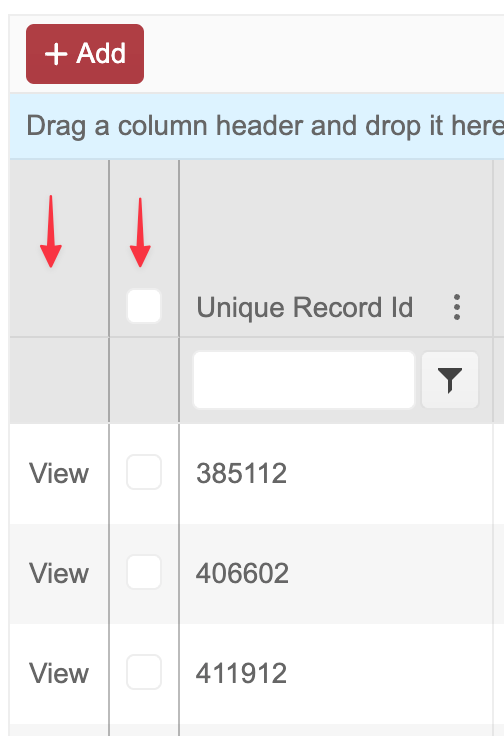
Fixed ‘View’ and ‘Checkbox’ columns
‘View’ and ‘Checkbox’ columns are now fixed to the left of the grid and remain in place during horizontal scrolling.
Expand Grid
At the bottom left of the grid you can select the ‘Expand Grid’ icon.

This enlarges the grid to provide you with more real estate to analyse your data. The grid will enlarge to the full size of your browser window.
Clicking on the icon a second time returns the grid to the standard layout.
Toasters
What are Toasters? – a toaster refers to a notification system that pops up at the top right of the web page.
This notification can be in the form of an error message, alert, or simply information. The purpose of a web development toaster is to notify you of something without interrupting the current task.
An example Toaster after a record has been updated via the portal is shown below.

Toasters will automatically disappear after a few seconds.
Clearing Browser Caches
If you experience any unexpected behaviour with the new View Data grid, please clear your browser cache before logging a support ticket.
To clear your browser cache, please follow the instructions below for the browser you are using:
Chrome
- Click on 3 grey dots at top right of browser window
- Select ‘Settings’
- Select ‘Privacy and security’
- Select ‘Clear browsing data’
- Choose a ‘Time range’ of 24 hours
- Select ‘Clear Data’
- Close and Open Chrome again
Safari
- Goto ’Setings’
- Select “Privacy’
- Choose ‘Manage Website Data’
- Search for ‘AppCan’
- Select the appcancloud.com cookie and remove that
- Close and Open Safari again
Firefox
- Click on 3 grey bars (Hamburger) at top right of browser window
- Select ‘Settings’
- Select ‘Privacy & Security’
- Select ‘Clear Data’ under ‘Cookies and Site Data’ section
- Select ‘Clear’
- Close and Open Firefox again
Microsoft Edge
- Click on 3 grey dots at top right of browser window
- Select ‘Settings’
- Select ‘Privacy, search, and services’
- Select ‘Choose what to clear against ‘Clear browsing data now’
- Choose a ‘Time range’ of 24 hours
- Select ‘Clear now’
- Close and Open Microsoft Edge again
Date / Time Browser Settings
It is important to ensure the language settings on your browser are set to the required locale to ensure date/time formats are set correctly. For instance, if located in the United Kingdom, ‘English (United Kingdom)’ or English (GB) should be the default language set.
Google Chrome
- Select the 3 dot icon at the top right-hand-side of your the browser.
- Choose the ‘Settings’ option
- Select ‘Languages’
- Add required Language and make it the default (Select 3 dots icon and choose ‘Move to the top’)
Firefox
- Select the hamburger icon at the top right-hand-side of your the browser.
- Choose the ‘Settings’ option
- Scroll down to ‘Language’ section
- Add required Language and make it the default
Microsoft Edge
- Select the 3 dot icon at the top right-hand-side of your the browser.
- Choose the ‘Settings’ option
- Select ‘Languages’
- Add required Language and make it the default (Select 3 dots icon and choose ‘Move to the top’)